
Assignment: To create a light piece based on a specific historical architectural or design style.
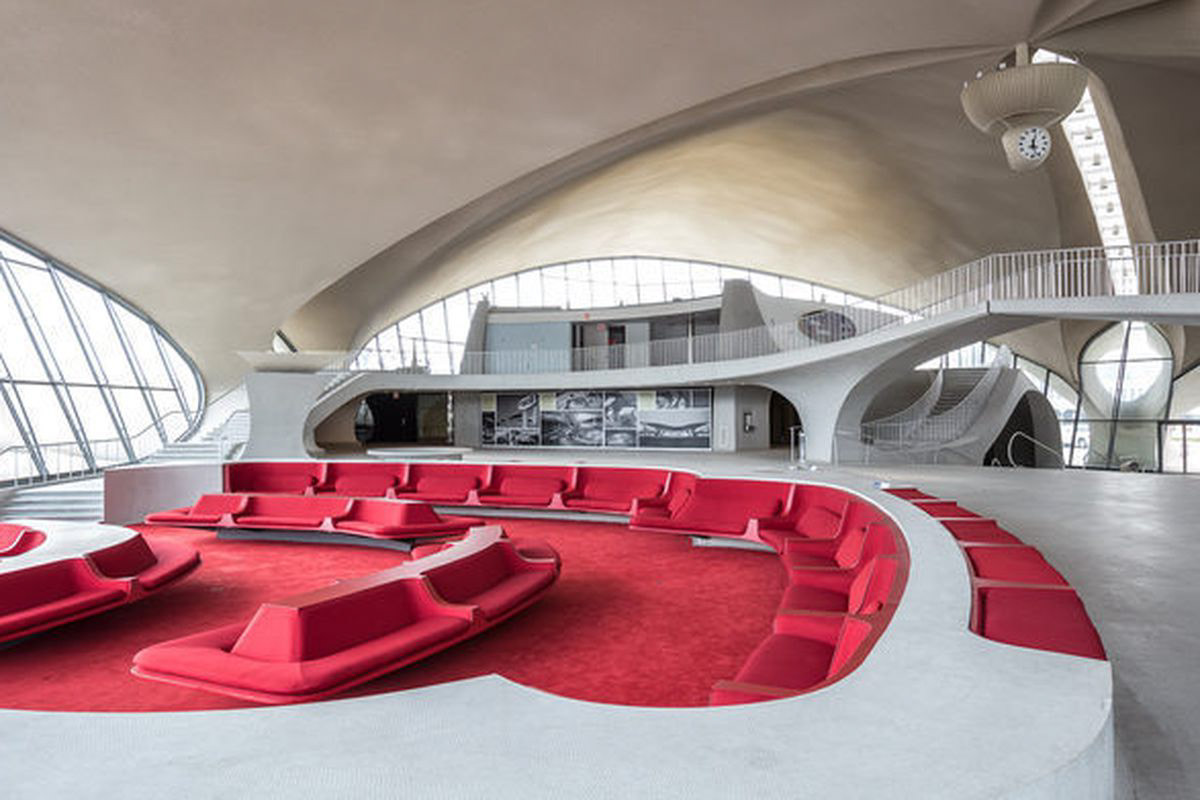
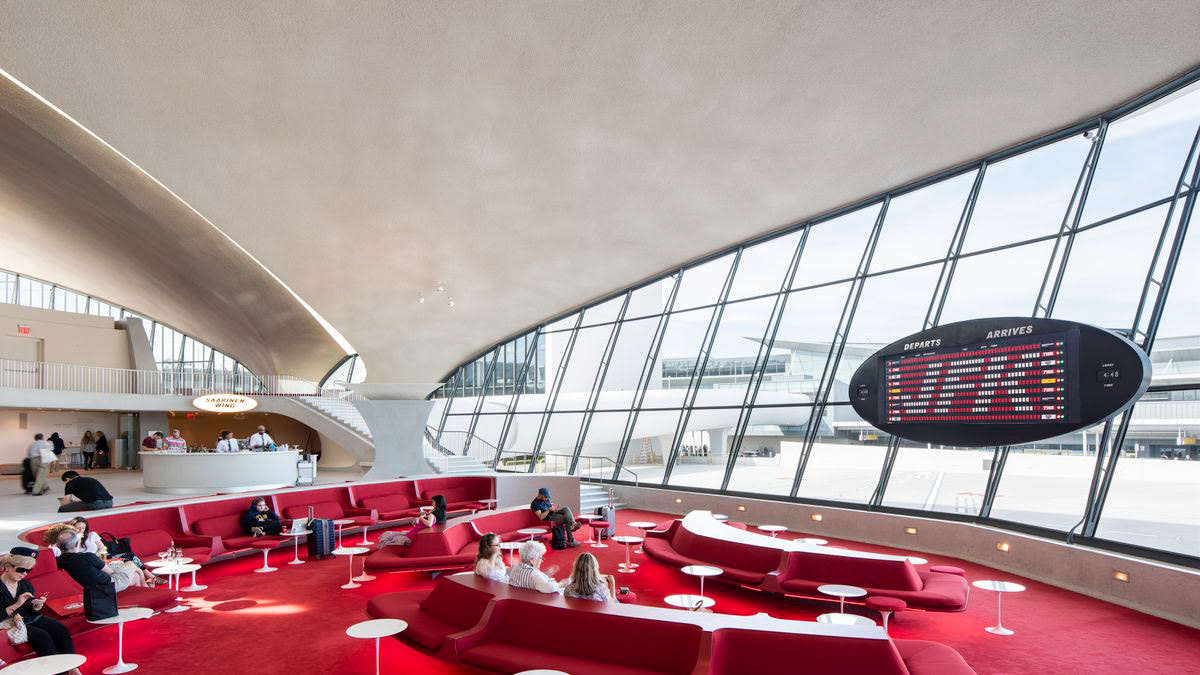
Inspiration: Trans World Flight Center at John F. Kennedy Airport by Eero Saarinen.
Made entirely from concrete, its cold, solid exterior contrasts the warm, diffused light within. This light is designed as a functional, yet primarily beautiful display piece, specifically intended for use in living spaces, such as bedrooms or living rooms.

Inspiration Imagery
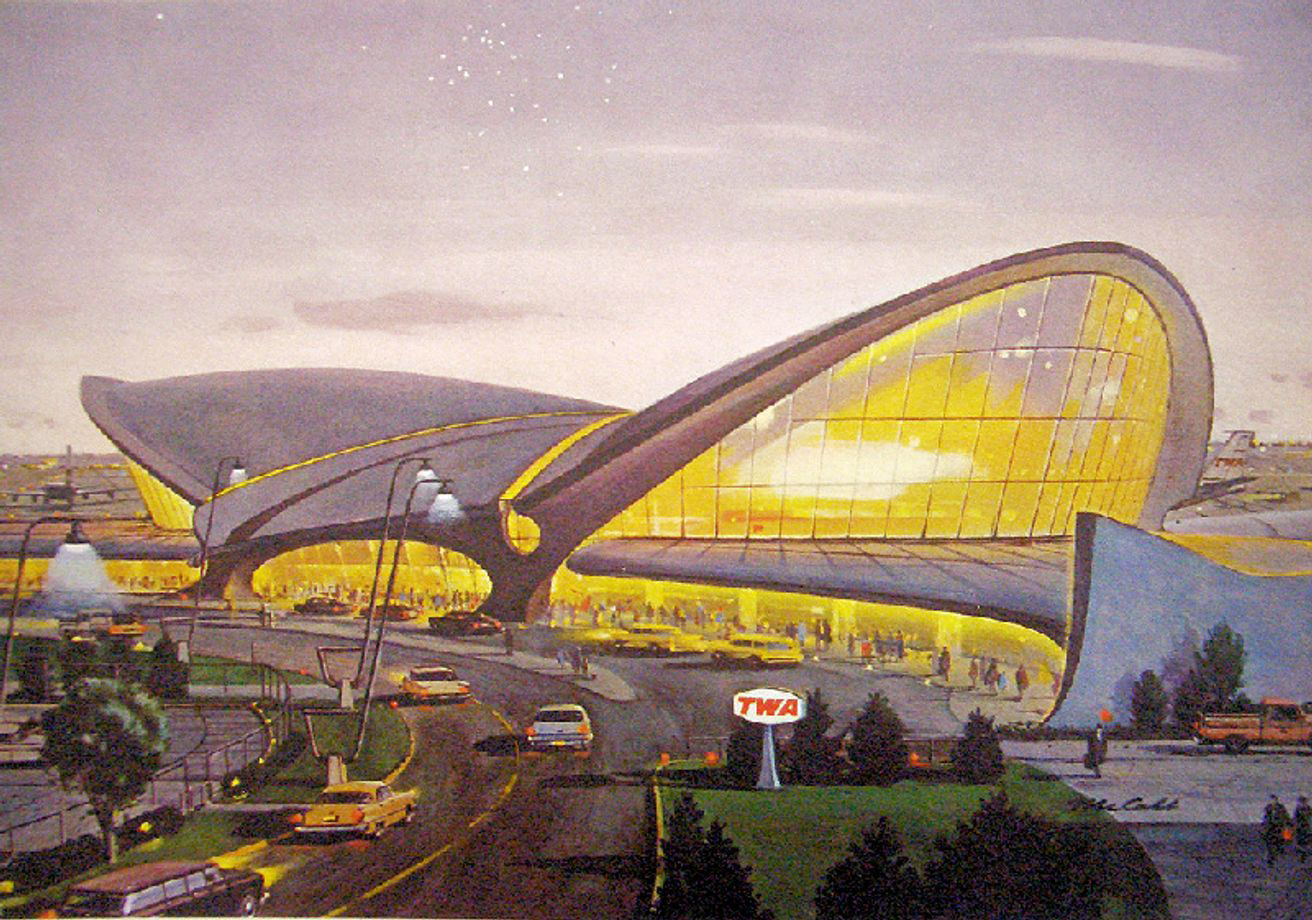
https://architectuul.com/architecture/twa-flight-center
https://ny.curbed.com/2015/10/2/9914902/you-have-one-last-chance-to-visit-the-twa-flight-center
https://ny.curbed.com/2019/7/23/20696897/twa-hotel-jfk-airport-new-york-history-preservation
Initial Concept Generation
Explored forms that were reminiscent of the iconic organic styling of the TWA terminal.

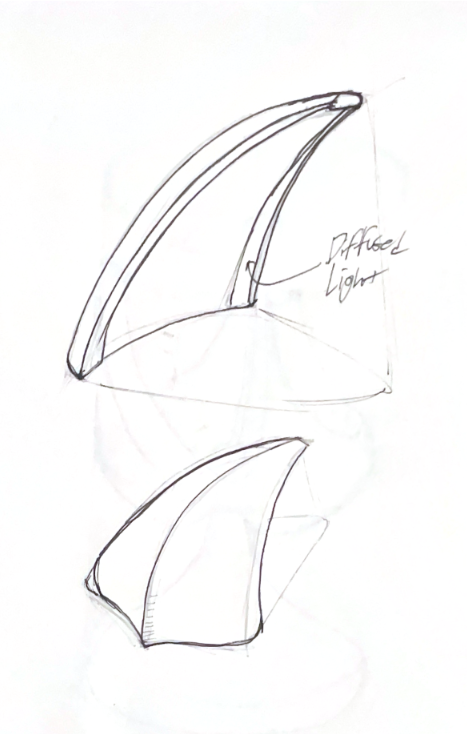
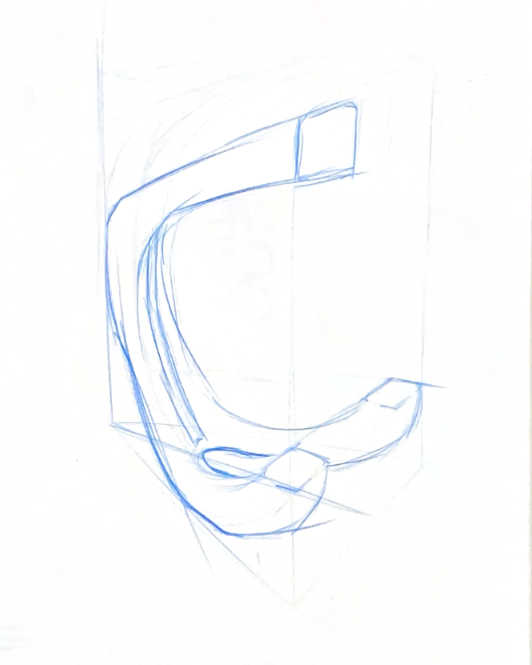
Final Concept Sketch
This form was selected for the final design as it both reflected the distinct styling of the flight center, while also allowing exploration of concrete as the intended material.

Plasticine Model
After sketching the final form, I created a model out of plasticine clay to experiment and visualize levels of curvature and overhang.


Constructing
My first step after finalizing the form was to model it in CAD software. I was very familiar with the solid modeling aspect of CAD, but not surface modeling, which is what I needed to use for this project.
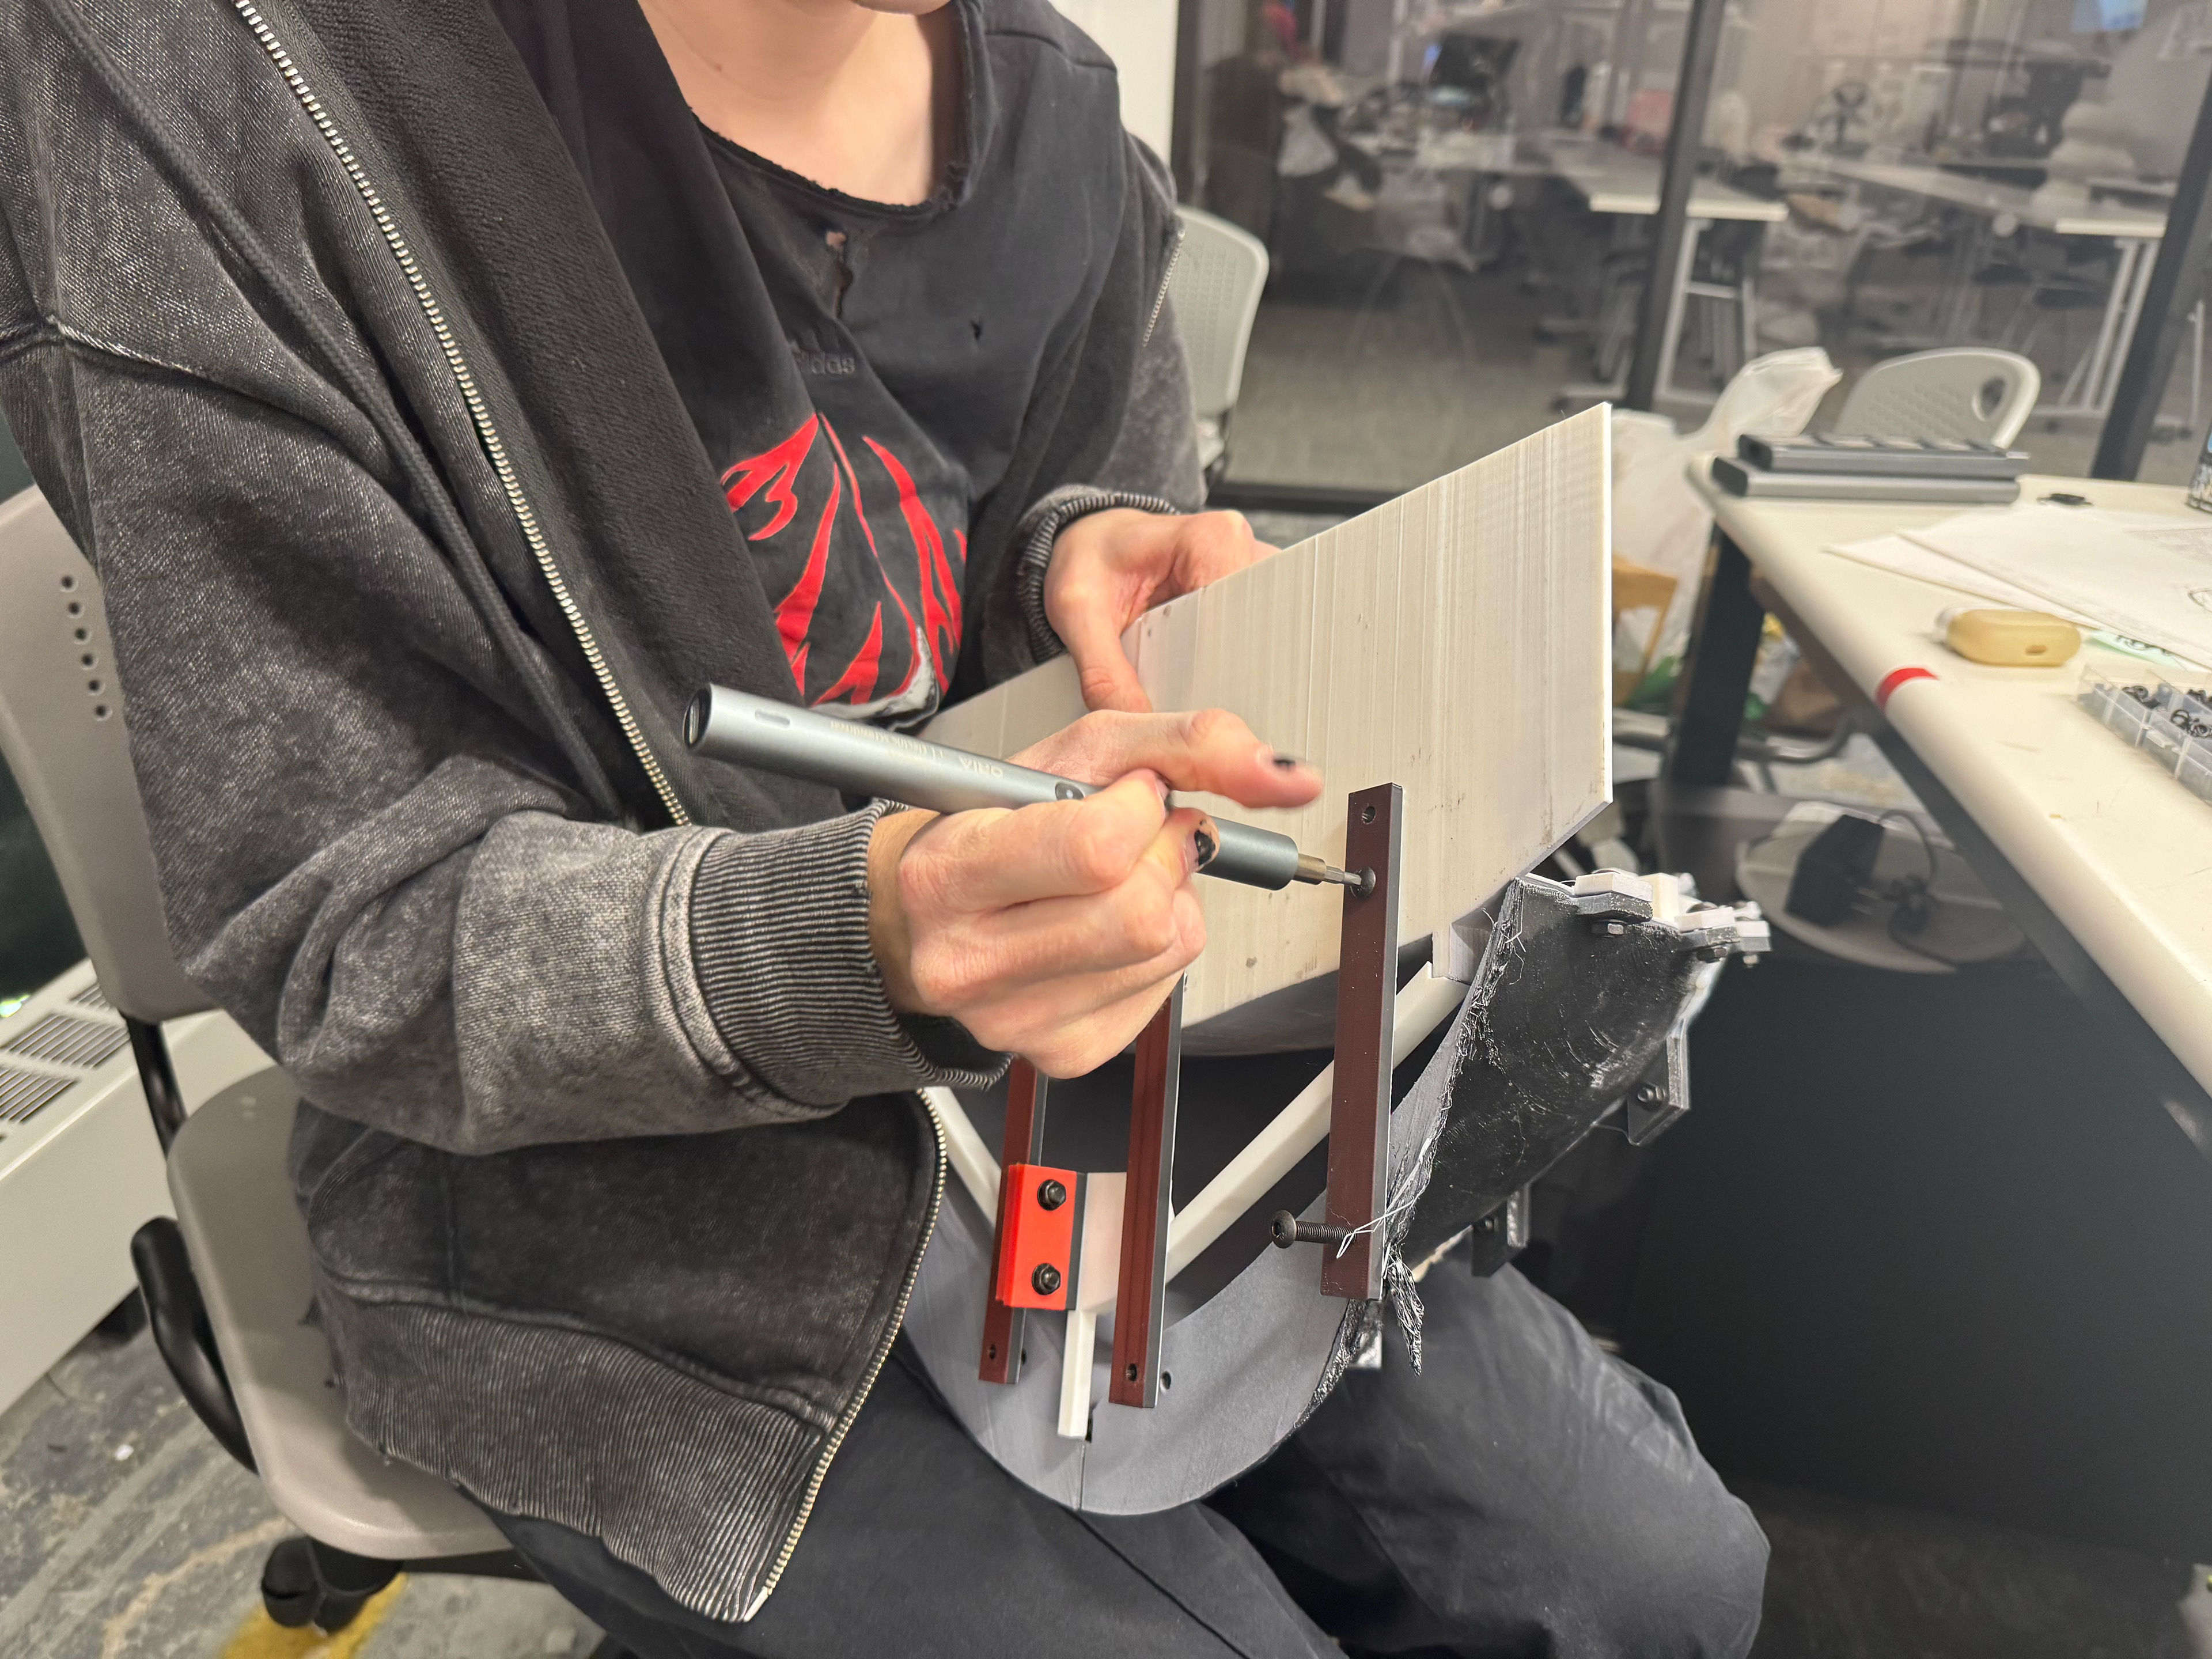
I eventually completed the form, and created a two part mold to pour the concrete into. However, I was limited by the bed size of the 3D printers I had access to, and had to split the mold into 8 different parts for the body, and two for the wiring channels.
After numerous failed prints I was able to assemble the mold using M5 screws. I filled the seams with plasticine, sprayed the mold with filler primer, then sanded it until smooth. I then mixed the concrete, pressed it into the mold and let it cure.
After demolding, I trimmed a light strip and soldered the wires, then inserted it into the channel in the concrete form.


Conclusion
I am incredibly happy with the end result. While I had originally intended the form to be totally smooth and solid, the final result's chipped, weathered, and seamed appearance appealed to me even more.
I would be interested to try this project again to achieve a more smooth exterior finish. To achieve this result I would need to: modify my CAD model to reduce the depth of the channels for light, print the mold in two main pieces, and experiment with different moisture levels from mixing the concrete.
Overall I'm extremely happy with the result of this project, and have learned a lot from it!


